OVERVIEW
For this assignment, we covered the fundamentals of electricity and coding to then eventually create a show of some nature to display what we learned over the course of this unit. We first took a week to familiarize ourselves with the components of creating complete circuits through a series of different experiments, focusing on the connections of alligator clips, lightbulbs, batteries, and circuit diagrams. Once we completed that packet, we moved on to circuits on breadboards, gradually increasing the circuit's difficulty as we grew more comfortable and experienced. The breadboards allowed for us to test rather complicated sets of wiring, from LED light shows to the incorporation of potentiometers. Finally, we were ready to code using the Arduino program. With sixteen different codes with the Arduino program and a breadboard, we learned how to relay data to and from the computer through a set technological system. The code had to be complete and perfectly in order to be processed and carried out as we wanted on the breadboard. As we accustomed ourselves to these parts of coding, we were finally ready for the final Robot Art Show Project after the span of a few weeks!
CONTENT
CIRCUIT: loop of conductive material from one terminal of a power source to the other that controls the flow of charge/electricity
SERIES: components are connected along one pathway, keeping the current the same through the entire circuit
PARALLEL: components are connected along in an individual pathway, splitting the current inversely to resistance
CURRENT (i): flow of charge or electricity through a circuit
FORMULA: current=Voltage/resistance
UNITS: Amperes (amps)
RESISTANCE (r): obstacle to the current that slows it down
FORMULA: series: resistance(total)=resistor(1)+resistor(2)+resistor(3)
parallel: 1/resistance(total)= 1/resistor(1)+1/resistor(2)+1/resistor(3)
UNITS: Ohms
VOLTAGE (V): potential energy difference across a component in a circuit
FORMULA: Voltage=current(resistance)
UNITS: Volts
BREADBOARDS: construction base for making experimental circuits temporarily through connections between the holes across the surface
CODING: programming statements that are made to be relayed and understood by a computer that are then executed as instructed
THE CODE
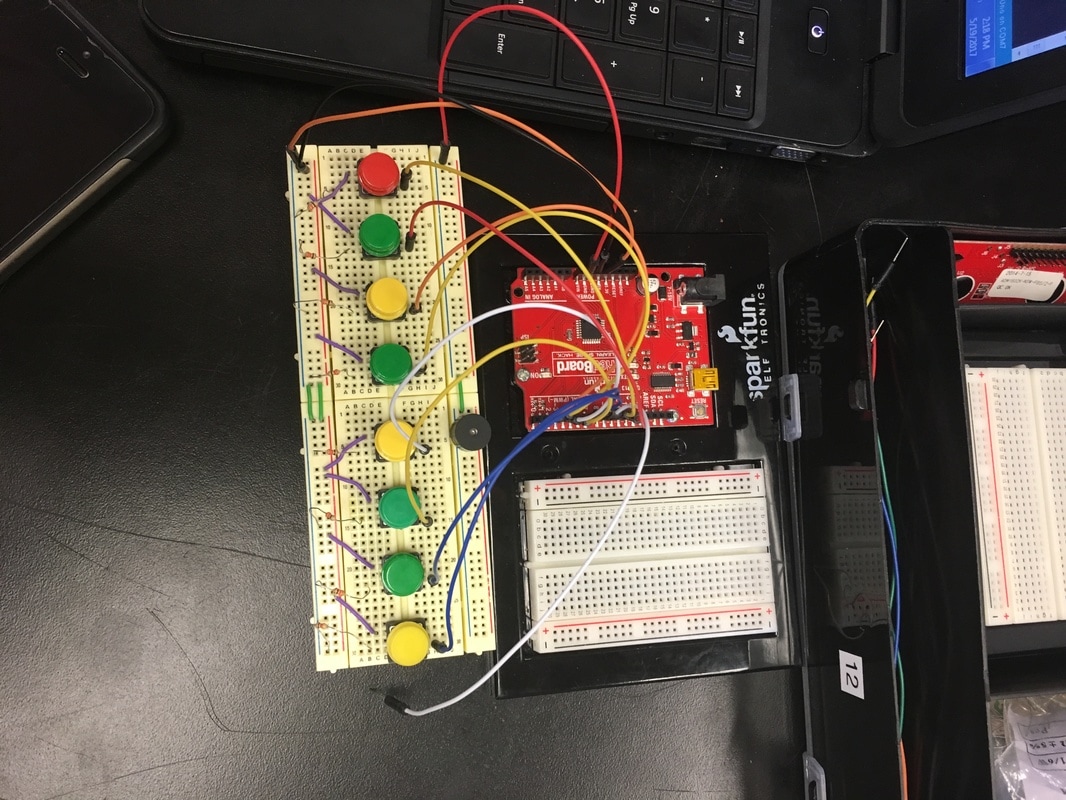
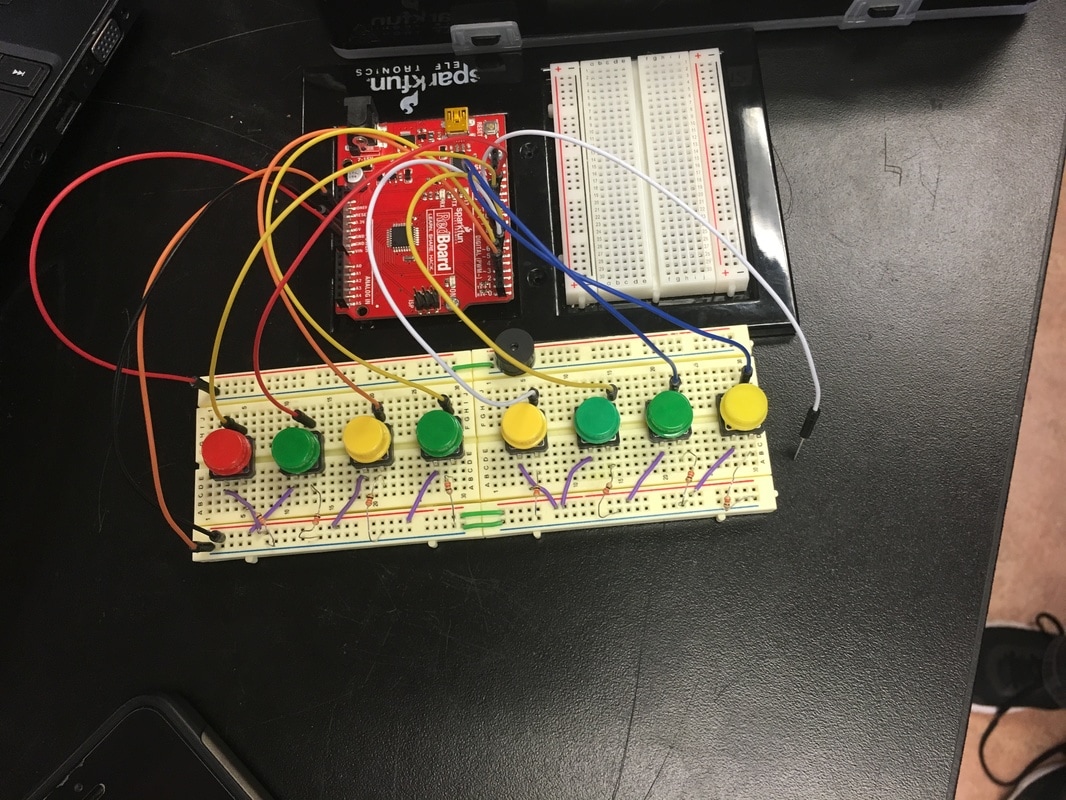
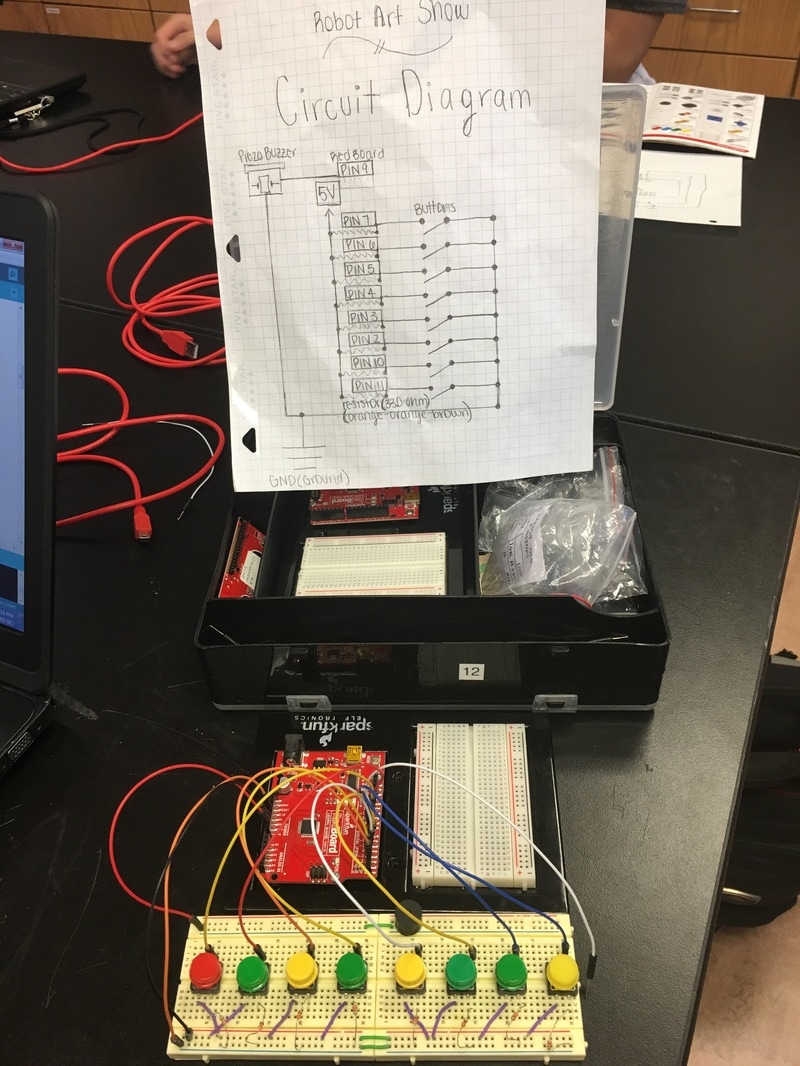
In our code for our breadboard keyboard, we first declared all variables, including each button and the purpose of individual external modules. We then created if-then statements to assign each button with a designated frequency in order to have all notes needed in a C major scale. However, the project did not end up working once implemented, but was successful in our computer simulation. We suspect that one of the buttons on the breadboard was broken, but did not truly find the reason our keyboard could not play as desired.
REFLECTION
Personally, this project was not one that I found myself particularly interested in. I definitely felt that my distaste for coding and programming overall slowed my group down. To improve upon this, I hope to find a way to focus on projects I do not enjoy as much as others and truly strive for achievement. However, I did find myself becoming more and more eager to brainstorm ideas and create solutions as the coding progressed to the Arduino program, something I found myself liking more than the previous circuit packets. I thought that my improvement on involvement within the group just took some time, but I eventually became much more active.
Another aspect of this unit that bothered me quite a lot was how much detailed thinking was involved. There was so many step-by-step, necessary instructions that I found myself to skip over and even ignore. To work on this, I need to be much more patient with myself and the task at hand. I can say that one of the best parts of this project was my patient group members. Something I did well was making sure that I understood all concepts at hand, which required a lot of answers to my stream of questions. We did work well altogether to produce something rather unique and original. While the end result might not have turned out as we hoped, we persevered through several obstacles to produce a keyboard to be proud of!
Another aspect of this unit that bothered me quite a lot was how much detailed thinking was involved. There was so many step-by-step, necessary instructions that I found myself to skip over and even ignore. To work on this, I need to be much more patient with myself and the task at hand. I can say that one of the best parts of this project was my patient group members. Something I did well was making sure that I understood all concepts at hand, which required a lot of answers to my stream of questions. We did work well altogether to produce something rather unique and original. While the end result might not have turned out as we hoped, we persevered through several obstacles to produce a keyboard to be proud of!
